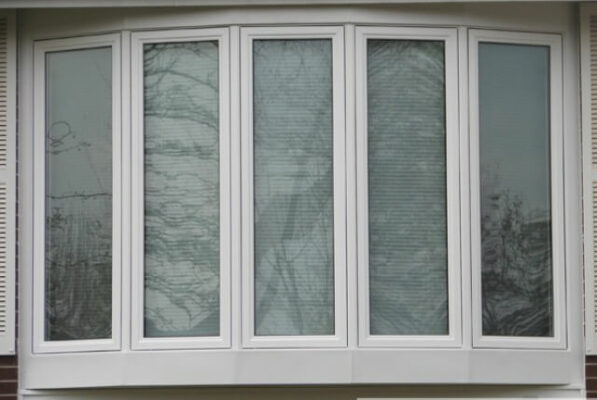


Windows are critical for allowing natural light into our homes and improving energy efficiency and the overall aesthetic of our living spaces. However, windows can deteriorate over time, so it’s essential to replace windows to keep our homes safe and aesthetically pleasing. If you’re considering replacing old windows, you can finish this home repair job with a few safety precautions and easy-to-follow procedures for a proper window installation.
Materials Required
- Caulk: You’ll need high-quality caulk to close gaps and cracks between the window frame and the wall.
- Minimal Expanding Foam: Minimal expanding foam is great for filling any odd gaps around the window. It stretches a little after being used, making an airtight seal.
- Shims: Shims make sure that the window is installed straight and level. They help adjust the window so that it fits perfectly in the hole.
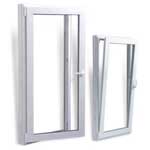
Window Replacement Options
When replacing vinyl replacement windows, you have two options: brick-to-brick installation and retrofit installation windows.
Brick-to-Brick Window Installation
- Remove all existing windows down to the house frame and replace them.
- A replacement window frame is necessary when the existing frame is old and deteriorating.
- An advanced project requires an interior trim, new jamb extension, exterior brick molds, and siding removal if needed.
Retrofit Installation
- A suitable option when the existing frames are still in good condition.
- Replaces only the existing sashes with smaller windows that fit inside the existing frames.
How to Measure for Replacement Windows
When it’s time to replace your windows, precise measurements are critical to ensuring a great fit. To correctly measure for replacement windows, follow these simple steps:
- Use a measuring tape to determine the dimensions (height and width) of the pocket opening where the new window will be installed.
- Ensure you measure inside the current frame, not between the areas that keep the sashes in place. Open the lower sash and measure the window’s left, centre, and right sides to determine the height. Measure the width at the top, middle, and bottom.
- Use the smallest height and width measurements you acquired in the previous step. These are the dimensions you’ll need when buying replacement windows.
- Measure each new window to ensure that it is the same size as the previous ones to ensure a precise fit.
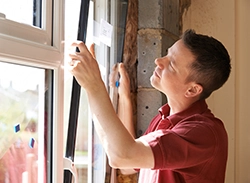
How to Remove the Old Window
Since every window is different, the steps for removing yours may differ. Although removing the sashes from the inside is often preferable, removing the existing outside windows will be easier for this project.
Step 1: Remove all Window Treatments and Hardware:
The first step is to remove any storm windows you might have. Removing storm windows by lifting them out of their channels is possible in some versions. Removing the screws that hold them in place may be necessary if the existing frames are still in good condition.
Furthermore, remove any curtains, blinds, or other window treatments. Remove all window hardware, including the locks, handles, and hinges.
Step 2: Remove Interior Trim:
Gently remove the interior trim surrounding the window with a pry bar and a hammer.
Begin at one corner and work your way around, being careful not to harm the interior wall.
Step 3: Remove Sash Weights or Springs
In older windows, it is common to find sash weights or springs that need to be removed. Here’s how to remove sash weights:
- Carefully cut the cords connecting the sash to the sash weights using a utility knife or scissors.
- Let the sash weights go. After you cut the cords, let the sash weights fall into the window frame.
How to Remove Sash Springs
- If your window contains sash springs, carefully remove them by raising the sash at the top of the window.
- Examine the springs for plastic covers, which may be present. Cut and remove these covers if at all possible.
- Remove the springs. If you can’t remove the plastic covers, don’t be concerned. When removing the springs, they will automatically break off.
- Find the screws holding the springs, then remove them using a screwdriver.
Step 4: Identify Stops
Identify any stops of the current window frame. The sashes of vintage wooden windows are held in place by the interior stops, parting stops in the space between the sashes, and exterior stops. The stops on the inside should be removed before installation from the inside, while the stops on the outside should be left alone. When working on a project that requires installation from the outside, removing the external stops and keeping the inside ones in place is necessary.
Step 5: Score and Remove Stops
First, use a utility knife to score where the stops meet the window frame. The stops may be removed by prying at them if they are not firmly attached. However, if they are securely connected, you’ll require an oscillating saw to cut them. Don’t force the saw; instead, stand back and let the blade do the work, keeping an eye out for any nails. After removing the stops, remove the upper sash, the parting stop, and the bottom sash.
Step 6: Fill Holes and Attaching New Pieces
A solid frame is essential before installing the new window. Fill any holes or gaps with wood filler to smooth the window frame. Next, ensure the wood where the new window will be screwed into the frame is firm for stability. During the inspection, carefully remove any broken or rotten wood and replace it with new wood of the same size. Install the new window on a solid base of screws and wood glue. Addressing frame concerns and reinforcing it with new wood will ensure a successful and long-lasting window replacement that improves your home’s performance and appeal.
How to Install the New Window
To install a replacement window for proper window installation, follow these steps:
Step 1: Clean your Window Opening
Make sure the window opening is well-cleaned and free of dust and debris. If you want to clean your window more thoroughly, use a shop vacuum.
Step 2: Apply Flashing Tape
Put flashing tape along the sill. It needs to be the right height and reach up the stool’s vertical leg to cover the sill (the lower ledge inside the window). Ensure to apply it to the stool’s corner.
Step 3: Level The Sill
Verify and correct the sill’s level as necessary, and ensure there is no bowing. If it’s not in place, use shims and adjust accordingly, then use flashing tape and screws to secure it properly. A level sill guarantees appropriate water drainage and effective window operation.
Step 4: Dry-Fit Your New Window
Dry-fit the new window into the opening to test the fit and alignment. Ensure there is a small gap around the frame. Set it aside before permanently installing it.
Step 5: Caulk the Seams
Along the interior head at the top of the window, apply a 3/8-inch bead of caulk. Also, apply on the sill and stops to add another line of defence against air and water ingress.
Step 6: Insert the Window and Ensure Security
Insert the new window into the interior stops against the caulk. To place securely, add shims in the pre-drilled frame screw holes. From the inside. Drive screws through the shims and into the holes.
Step 7: Check the Sashes
Ensure there are no impediments when the sashes open and close, as they should sit evenly within the frame. Use more shims if necessary to modify the new window frame at the meeting rails, which are the horizontal frame components on the sashes that meet when the window is closed.
Step 8: Ensure Your Window is Even
To ensure the window will fit properly, ensure it is level, square, and plumb (straight up and down). If required, make adjustments to the shims by cutting any sticking out to ensure an even installation.
Step 9: Fill in the Gaps
Use shims or insulation to close gaps between the window frame and the opening to enhance energy efficiency and prevent drafts. Spray foam insulation into any gaps around the window frame, but be careful not to overfill, and follow the manufacturer’s instructions. For more significant gaps, fill with backer rod weatherstripping for a waterproof, airtight seal.
Step 10: Measure the Window’s Height
Measure the window’s height from inside the frame on the bottom to size the sill adapter.
Step 11: Attach the Trim
Use finish nails to install outside trim around the window frame. To avoid denting the trim, drive the nails in using a nail set. Apply latex caulk to the trim’s margins, but avoid concealing weep holes. Use wood putty to cover any obvious nail holes and paint the trim as necessary.
Step 12: Interior Caulking
Apply caulk where the interior edges of the window contact the wall to offer extra insulation and a polished finish.
Tips and Tricks for Window Installation
Brick-to-brick window installation and retrofit projects require careful planning and precision to provide a seamless and weather-resistant finish.
Here are some crucial tips to help you through the process of replacing old windows into an existing frame (retrofit installation) or installing new windows in a new frame and brick wall (brick-to-brick installation):
- Removal of Siding: If needed, removing siding allows for the underlying structure to be seen clearly, making it easier to measure the window opening. Precise measurements are essential to ensure a suitable fit and to order the correct-sized windows.
- Quality Sealants and Flashing Materials: Brick-to-brick installations require weatherproofing because they help stop water intrusion. Add a high-quality jamb extension sealant that matches the thickness of the brick wall and flashing materials to protect the window against moisture damage.
- Select Energy-Efficient Retrofit Windows: Installing retrofit windows improves the energy efficiency of your house. Choose energy-efficient windows with triple-pane glass and Low E glass to lower heating and cooling costs while improving indoor comfort.
Professional Installation Consultation: If you are unsure about any part of the window installation, contact us for helpful advice. Our expert team at Eco Choice will assist you in making informed decisions about window selection and placement or performing a window installation.